
This tutorial is the second in our series about creating & editing pages using the WordPress Blocks editor. It follows on from Part 2: Working with Text Blocks.
What are Attachments?
You may be familiar with “attachments” from email, but WordPress has its own specific definition. In this context, and “attachment” is any type of file you might upload and make available through your page. They might also be generically referred to as “Media”, since they are all uploaded and managed through the Media Library (which you will meet in this tutorial).
An image is the most common type of attachment, but they can also be also PDF files, an MP3 audio files, ZIP archives, or any number of other file types. In this tutorial, “Images” specifically refers to images, but “Files” includes any type of file uploaded to your Media Library.
Adding Image Blocks
So far, we have added various types of text blocks to our content. However, we would have a pretty boring page if we didn’t spice things up with an image or two. Images are a great way to make your page interesting, and communicate the “feel” of your business to visitors.
As always, we’re going to start with the “Add Block” button. This time, We’ll select “Image” from the common blocks.
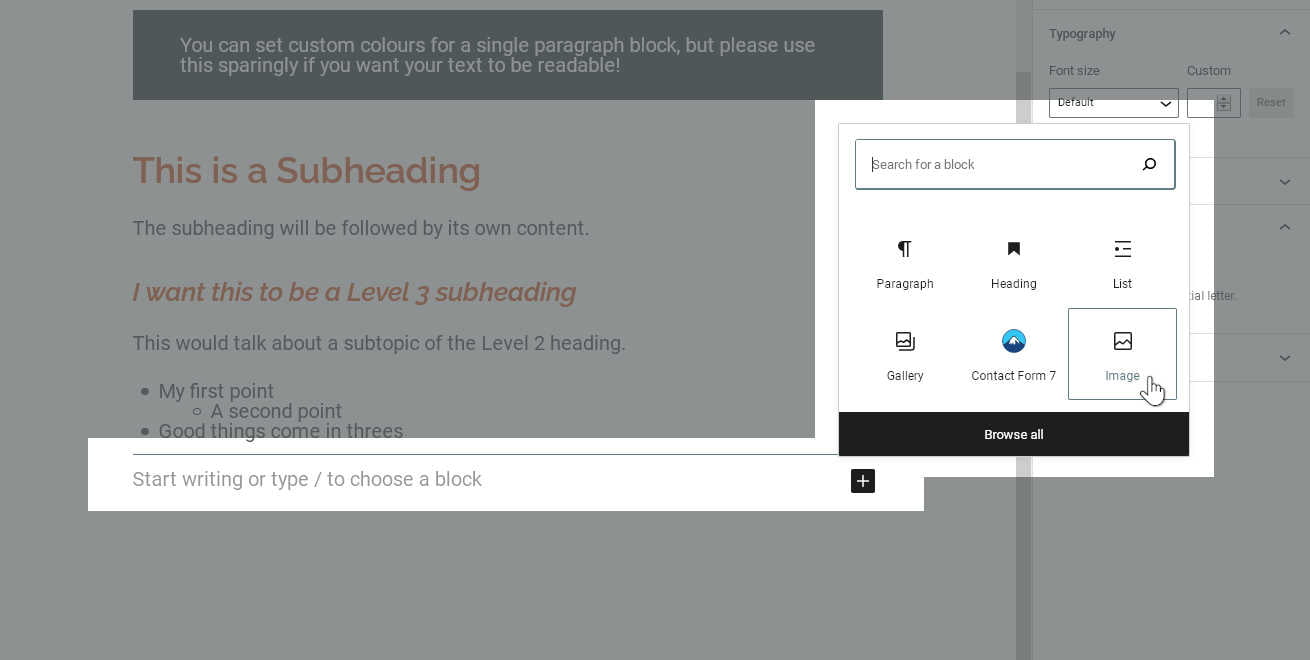
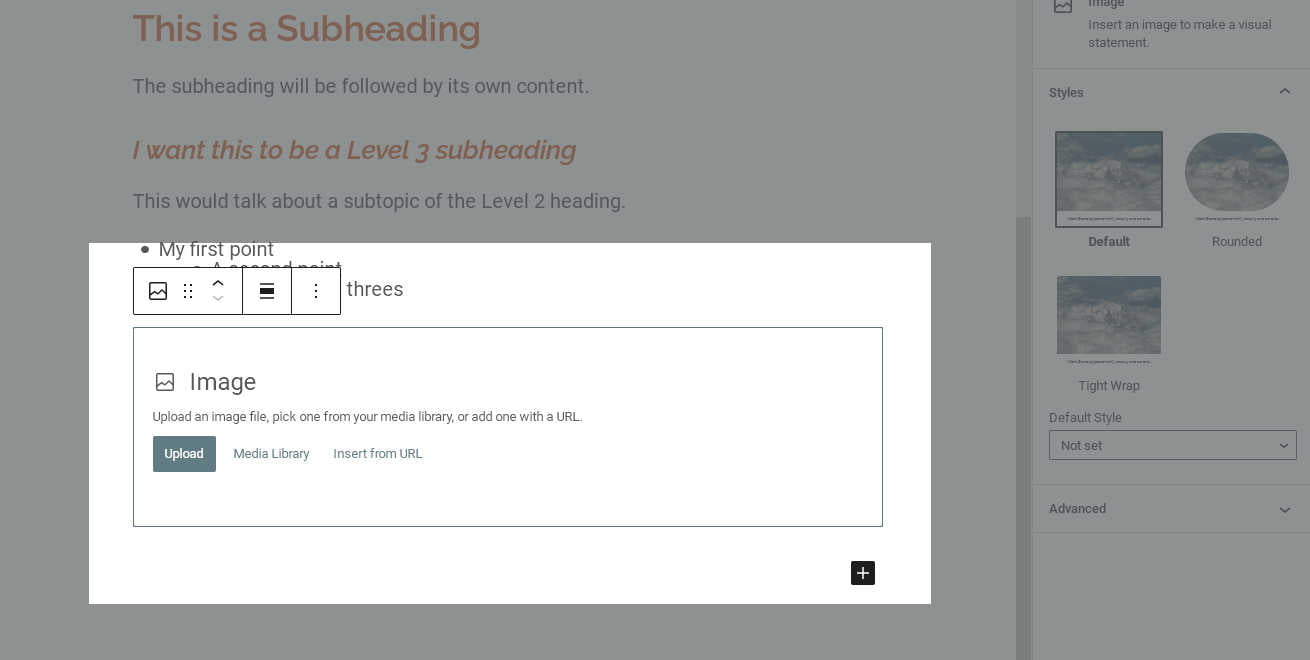
Right away, we can see that this will be a little more complicated than our text blocks. The empty Image block is a created with a few buttons which allow us to select the image we’d like to place. In almost all cases, we want to click on “Media Library”.
%27%20fill-opacity%3D%27.5%27%3E%3Cellipse%20fill%3D%22%23fff%22%20fill-opacity%3D%22.5%22%20rx%3D%221%22%20ry%3D%221%22%20transform%3D%22rotate(-94%20469.9%20-7.3)%20scale(254.288%20378.04365)%22%2F%3E%3Cellipse%20fill%3D%22%23535353%22%20fill-opacity%3D%22.5%22%20rx%3D%221%22%20ry%3D%221%22%20transform%3D%22matrix(176.60187%20-56.14719%20304.51327%20957.7971%201155.6%20119.7)%22%2F%3E%3Cellipse%20fill%3D%22%23888%22%20fill-opacity%3D%22.5%22%20rx%3D%221%22%20ry%3D%221%22%20transform%3D%22matrix(-917.0375%200%200%20-114.08117%20262%2064)%22%2F%3E%3Cellipse%20fill%3D%22%23949494%22%20fill-opacity%3D%22.5%22%20rx%3D%221%22%20ry%3D%221%22%20transform%3D%22matrix(-78.24749%2018.51415%20-140.68283%20-594.57643%201071.7%20637)%22%2F%3E%3C%2Fg%3E%3C%2Fsvg%3E)
A new, empty Image block %22%20transform%3D%22translate(2.6%202.6)%20scale(5.11719)%22%20fill-opacity%3D%22.5%22%3E%3Cellipse%20fill%3D%22%23fff%22%20cx%3D%2299%22%20cy%3D%2289%22%20rx%3D%2274%22%20ry%3D%2249%22%2F%3E%3Cellipse%20fill%3D%22%23535353%22%20rx%3D%221%22%20ry%3D%221%22%20transform%3D%22matrix(-65.94151%20-199.38871%2034.91446%20-11.54685%20232.9%2042.3)%22%2F%3E%3Cellipse%20fill%3D%22%23878787%22%20rx%3D%221%22%20ry%3D%221%22%20transform%3D%22matrix(-1.22016%20-25.8735%20216.70804%20-10.2197%2088.3%208)%22%2F%3E%3Cellipse%20fill%3D%22%23949494%22%20rx%3D%221%22%20ry%3D%221%22%20transform%3D%22matrix(14.57296%20-4.06884%2031.4645%20112.69315%20206.7%20110)%22%2F%3E%3C%2Fg%3E%3C%2Fsvg%3E)
Clicking the button to open the Media Library

This will open a new, nearly full-screen popup dialogue, which is our WordPress Media Library. Here, we can see all files we have uploaded to our WordPress site. We can also upload new files, which—presuming we have not already uploaded our image—is exactly what we need to do.

The easiest way to upload a file to the Media Library is to open the folder on our computer, then drag the file we want into the Media Library window. If we’re doing it correctly, the window will turn blue when we hold the file over it, and we will see the text “Drop files to upload“.

We release the file, and it begins to upload to our WordPress site. While the upload is in progress, we can see a blue progress bar over the the thumbnail, and in the right-hand side panel.

Providing Attachment Details
Once the upload has completed, we can see the image thumbnail. (It should also be automatically selected, as in the screenshot below.) The right-hand panel now displays “Attachment Details”, with some information automatically taken from our filename.

Before we select the new file, we should provide some descriptive text for these Attachment Details fields. The “Alt Text” field should contain a brief and practical description of the image content, like in our example.
Alt text is very important for images, as it will help vision-impaired visitors understand the content even if they can’t see it. Search engines also use alt text to understand your images, so if you want people to find your page, make sure you provide this info!

The “Title“, “Caption” and “Description” fields are less important, but might still be used by your theme (for example, as thumbnail or lightbox captions). Since we don’t want to write a specific caption for this image, we will just copy the alt text into all fields.

Once we are satisfied with our attachment details, we need only to click the “Select” button, all the way down in the bottom right corner.

This closes the Media Library and populates our Image block with the newly-uploaded image. By default, WordPress has filled the caption area with the text we entered in our attachment details.
Image Block Settings
At this point, our Image block is complete and ready to publish. We can also go on to fine-tune various settings, found in the right-hand “Block” sidebar.
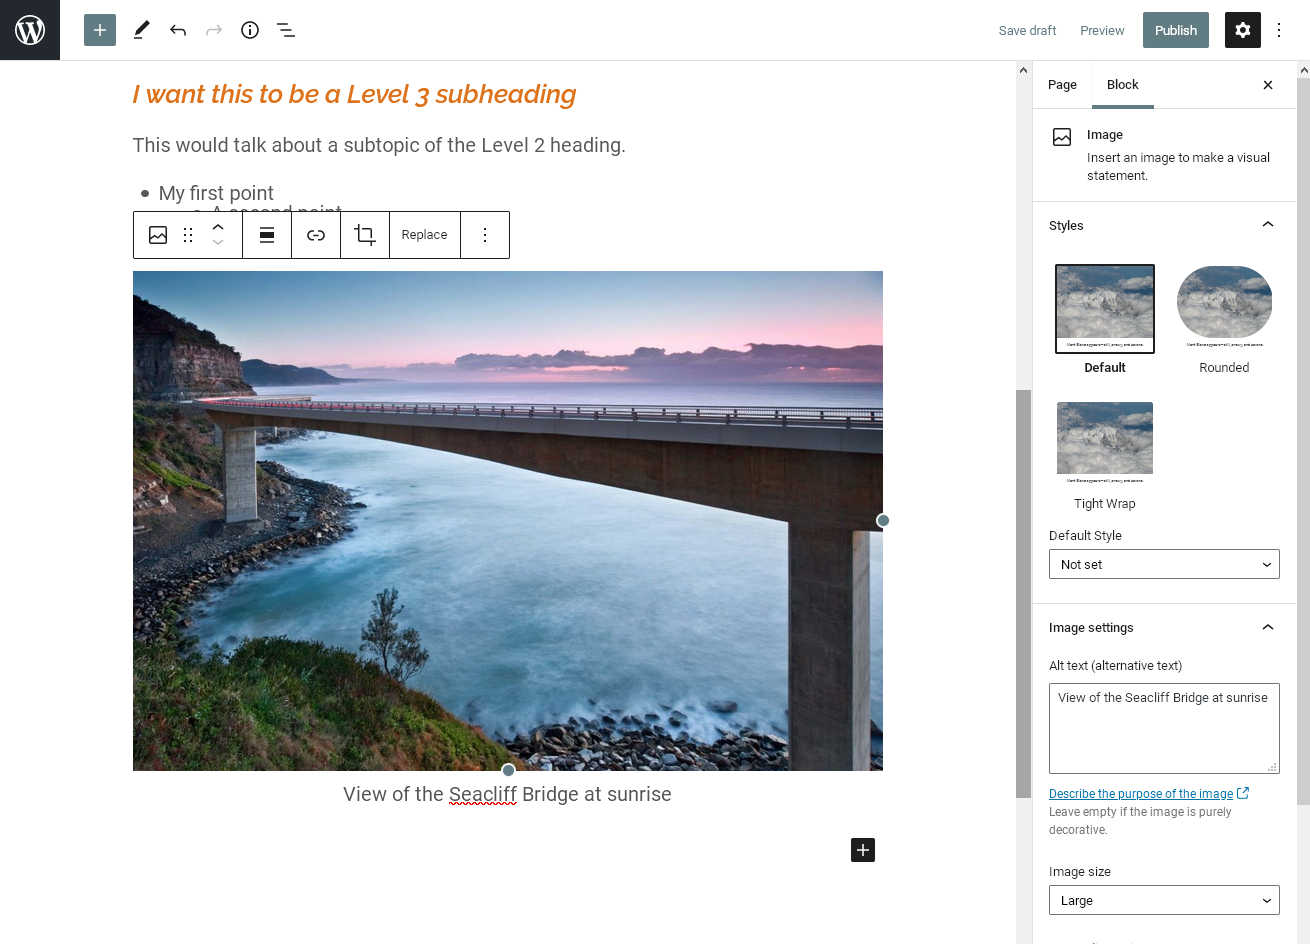
Image Links
The most common edit after adding an Image block, is changing the Link Settings. By default, nothing will happen when a visitor clicks on your image. (This might change depending on your theme. However, it’s nice to get a closer look at an image sometimes—most visitors expect that if they click or tap an image, they’ll see it in more detail.
To add a link to our image, we use the button displaying with chain links icon. (It’s the same as the button we used to make a text link, too.)
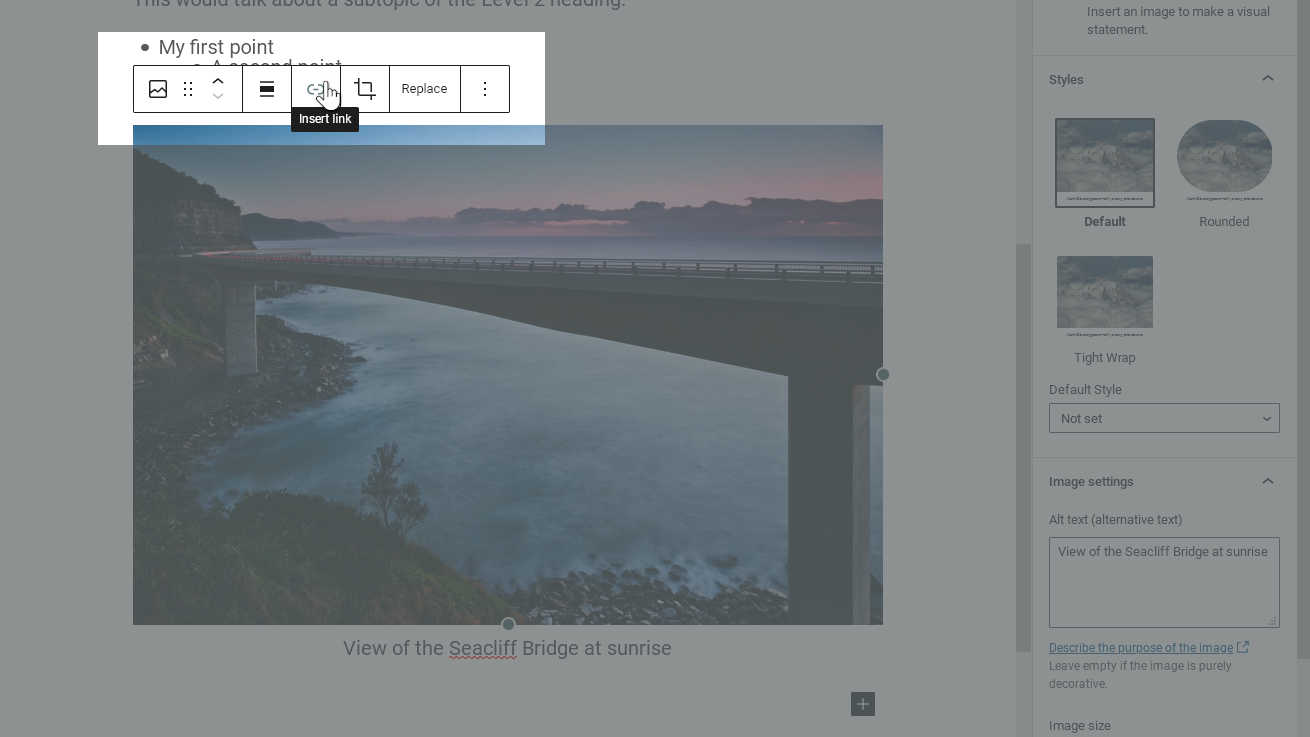
This will open a short menu with different options for our image link. We’d like our visitors to get what they expect, so we’re going to select “Media File“.
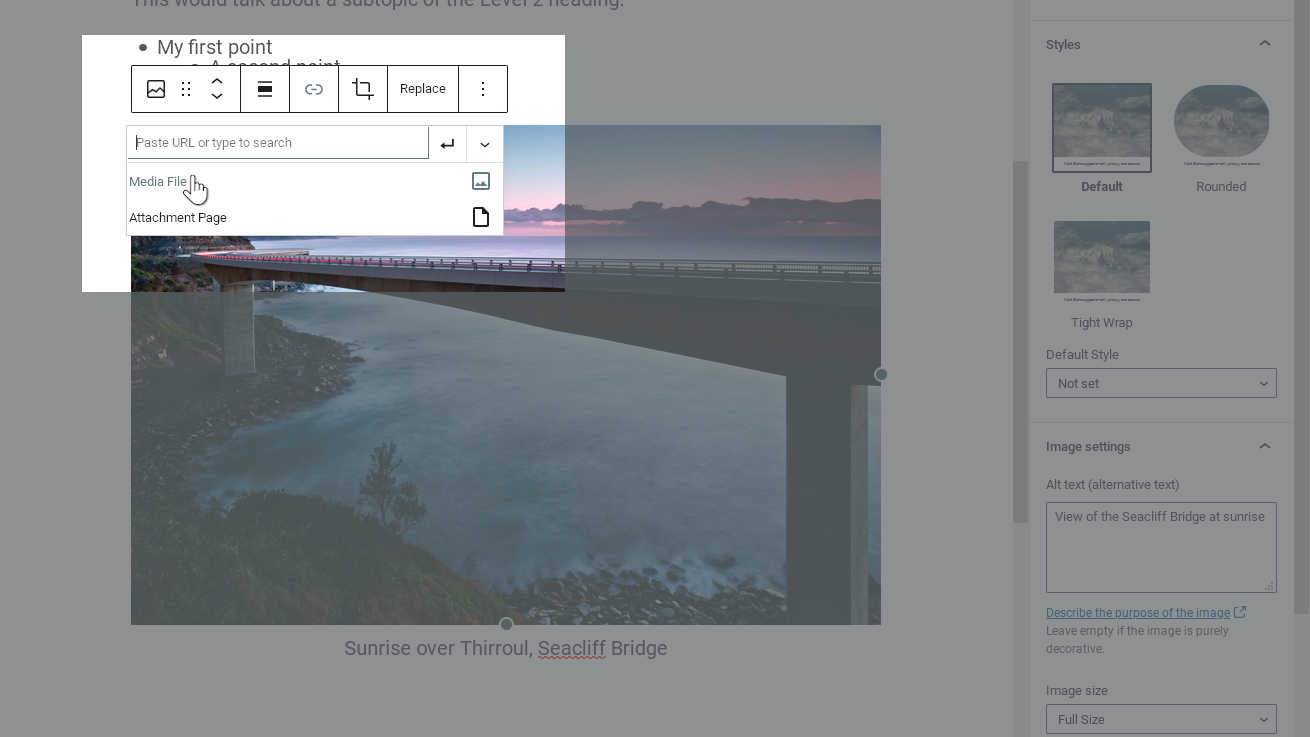
We could instead use “Attachment Page” if we want to load a new page showing details about the image file, but this information probably doesn’t have any value to a visitor. (We certainly don’t want a search engine to send anybody there.) For this reason, Many WordPress users disable attachment pages altogether.
If we want to turn the image into a custom link (for example, if it’s a promotional banner we want to link to another page) we could type a custom URL instead.
Image Size
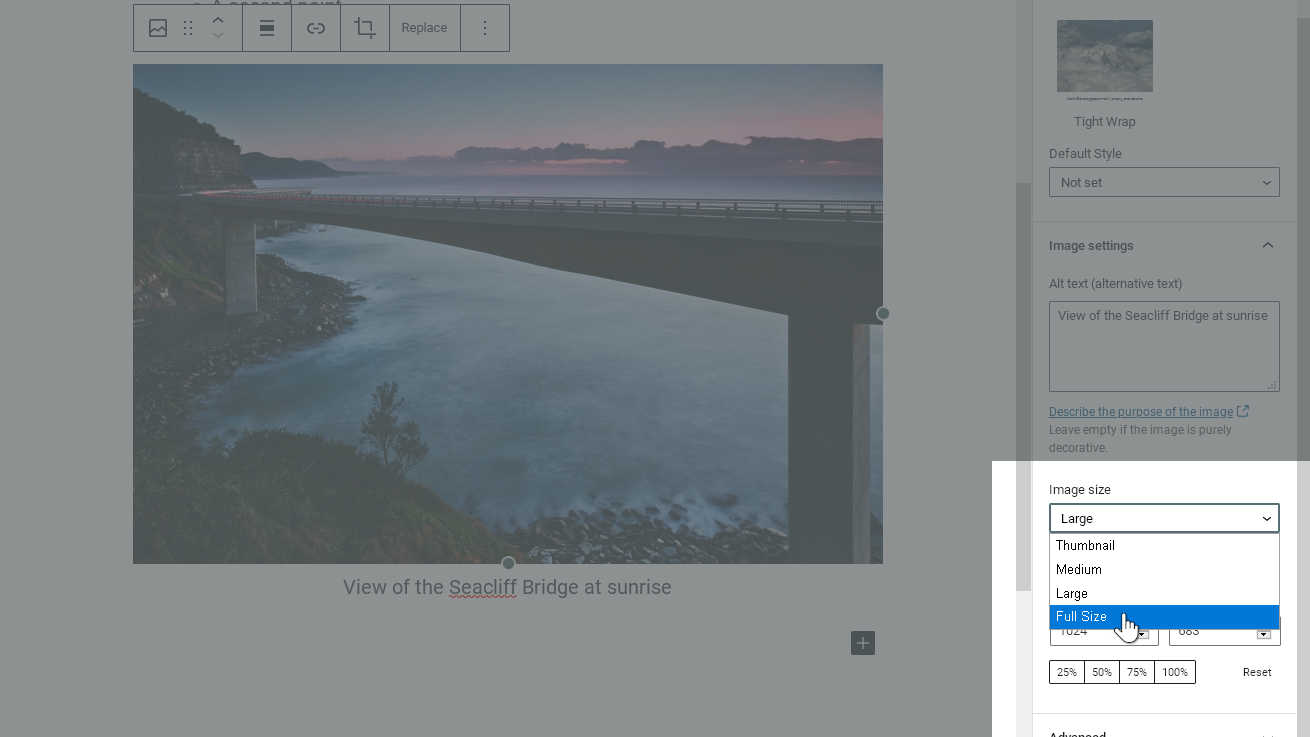
The most common change we need to make after creating an Image block is to change the display size. Naturally, we don’t want to force our visitors to download a full-screen image if we’re only trying to show them a thumbnail!
Fortunately, when we upload an image, WordPress generates multiple copies in a few useful sizes. Each time we add an Image block, we can choose the biggest size we want to make available.
Even if somebody loads our page on a huge screen, they won’t get a bigger version than the one we chose. However, if a visitor comes by on a small screen (like a tablet or smartphone), WordPress will automatically show them a smaller version so they don’t waste bandwidth. This is a great way to make sure your visitors see quality images, without having to wait for big image downloads!
Changing the Caption
When we created our Image block, it automatically filled out the caption based on the information we entered into the Media Library. Every time we use this image, that same caption will be provided for us automatically; we would need to go back to the Media Library if we wanted to update those the Attachment Details.
However, sometimes we might not want to change the attachment details, but we do want a custom caption for a particular Image block. In that case, we could simply type over the automatically-provided caption with whatever text we like.
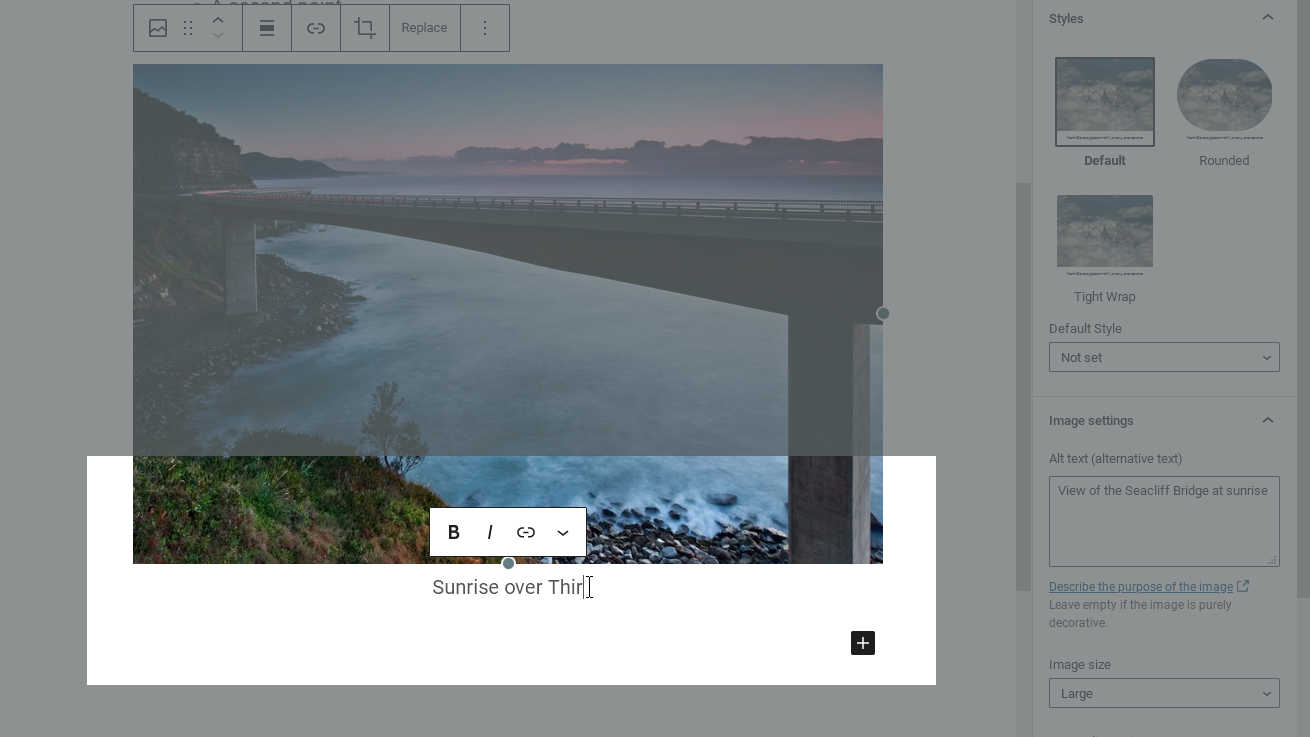
Image Alignment and Width
Finally, we might want to change how our image is aligned and scaled in relation to other content. By default, no value is set, which means we’re letting the theme use its default value. This usually means centred images.
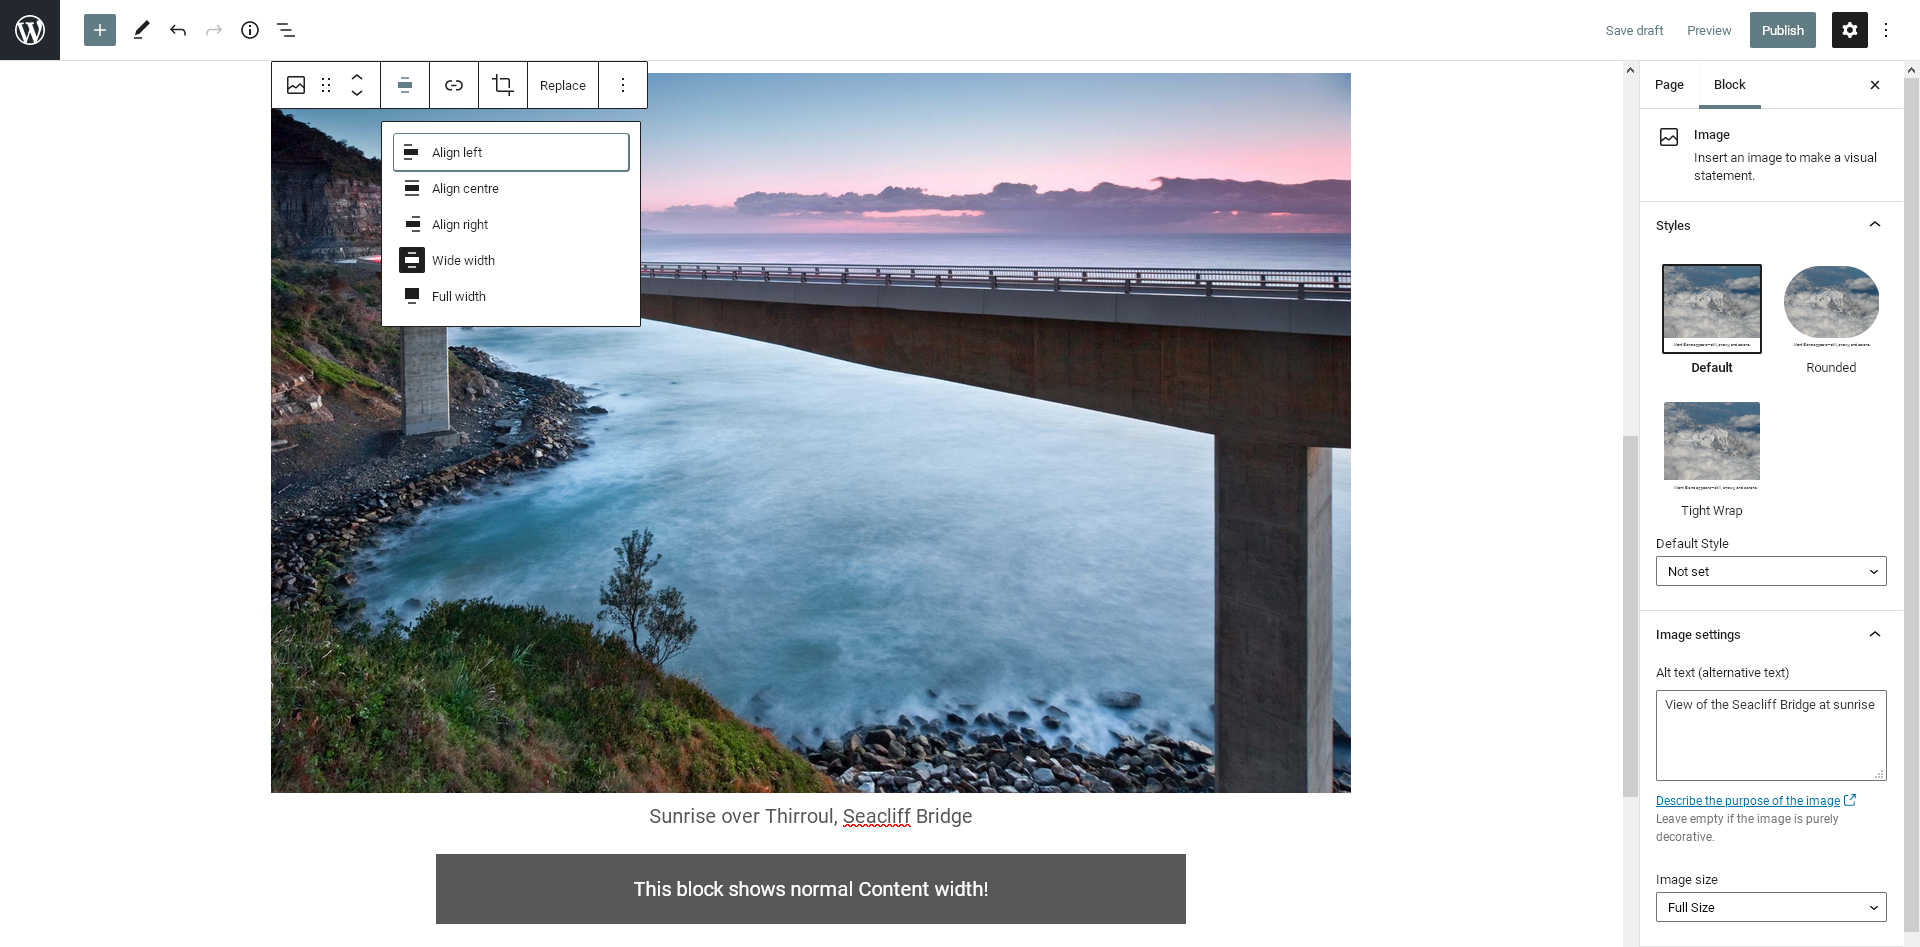
If we want to make a more specific choice, we can use the Image block toolbar to choose an alignment or width value.
%22%20transform%3D%22translate(2.6%202.6)%20scale(5.11719)%22%20fill-opacity%3D%22.5%22%3E%3Cellipse%20fill%3D%22%23ccc%22%20cx%3D%2252%22%20cy%3D%226%22%20rx%3D%2282%22%20ry%3D%2225%22%2F%3E%3Cellipse%20fill%3D%22%23464646%22%20rx%3D%221%22%20ry%3D%221%22%20transform%3D%22rotate(-9.6%20539%20-515.6)%20scale(67.75734%2029.96771)%22%2F%3E%3Cpath%20fill%3D%22%23565656%22%20d%3D%22M26%2052h50v36H26z%22%2F%3E%3Cellipse%20fill%3D%22%23d7d7d7%22%20cx%3D%2264%22%20cy%3D%223%22%20rx%3D%2231%22%20ry%3D%229%22%2F%3E%3C%2Fg%3E%3C%2Fsvg%3E)
Changing the alignment/width setting for our Image block %27%20fill-opacity%3D%27.5%27%3E%3Cellipse%20fill%3D%22%23e6e6e6%22%20fill-opacity%3D%22.5%22%20rx%3D%221%22%20ry%3D%221%22%20transform%3D%22rotate(-62.8%20171.2%20-241.6)%20scale(270.44242%20361.7431)%22%2F%3E%3Cellipse%20fill%3D%22%23525252%22%20fill-opacity%3D%22.5%22%20rx%3D%221%22%20ry%3D%221%22%20transform%3D%22matrix(22.0399%20114.10899%20-390.67854%2075.45868%20502.5%20453)%22%2F%3E%3Cellipse%20fill%3D%22%23979797%22%20fill-opacity%3D%22.5%22%20rx%3D%221%22%20ry%3D%221%22%20transform%3D%22rotate(118.9%204.2%20154.3)%20scale(102.87443%20469.87257)%22%2F%3E%3Cellipse%20fill%3D%22%23fbfbfb%22%20fill-opacity%3D%22.5%22%20rx%3D%221%22%20ry%3D%221%22%20transform%3D%22matrix(51.70016%20146.67543%20-66.36924%2023.39383%20382%208.1)%22%2F%3E%3C%2Fg%3E%3C%2Fsvg%3E)
Image alignment/width options


Align Centre
The image is centred in the content area, at the size you have selected. Equivalent to the default on most themes.
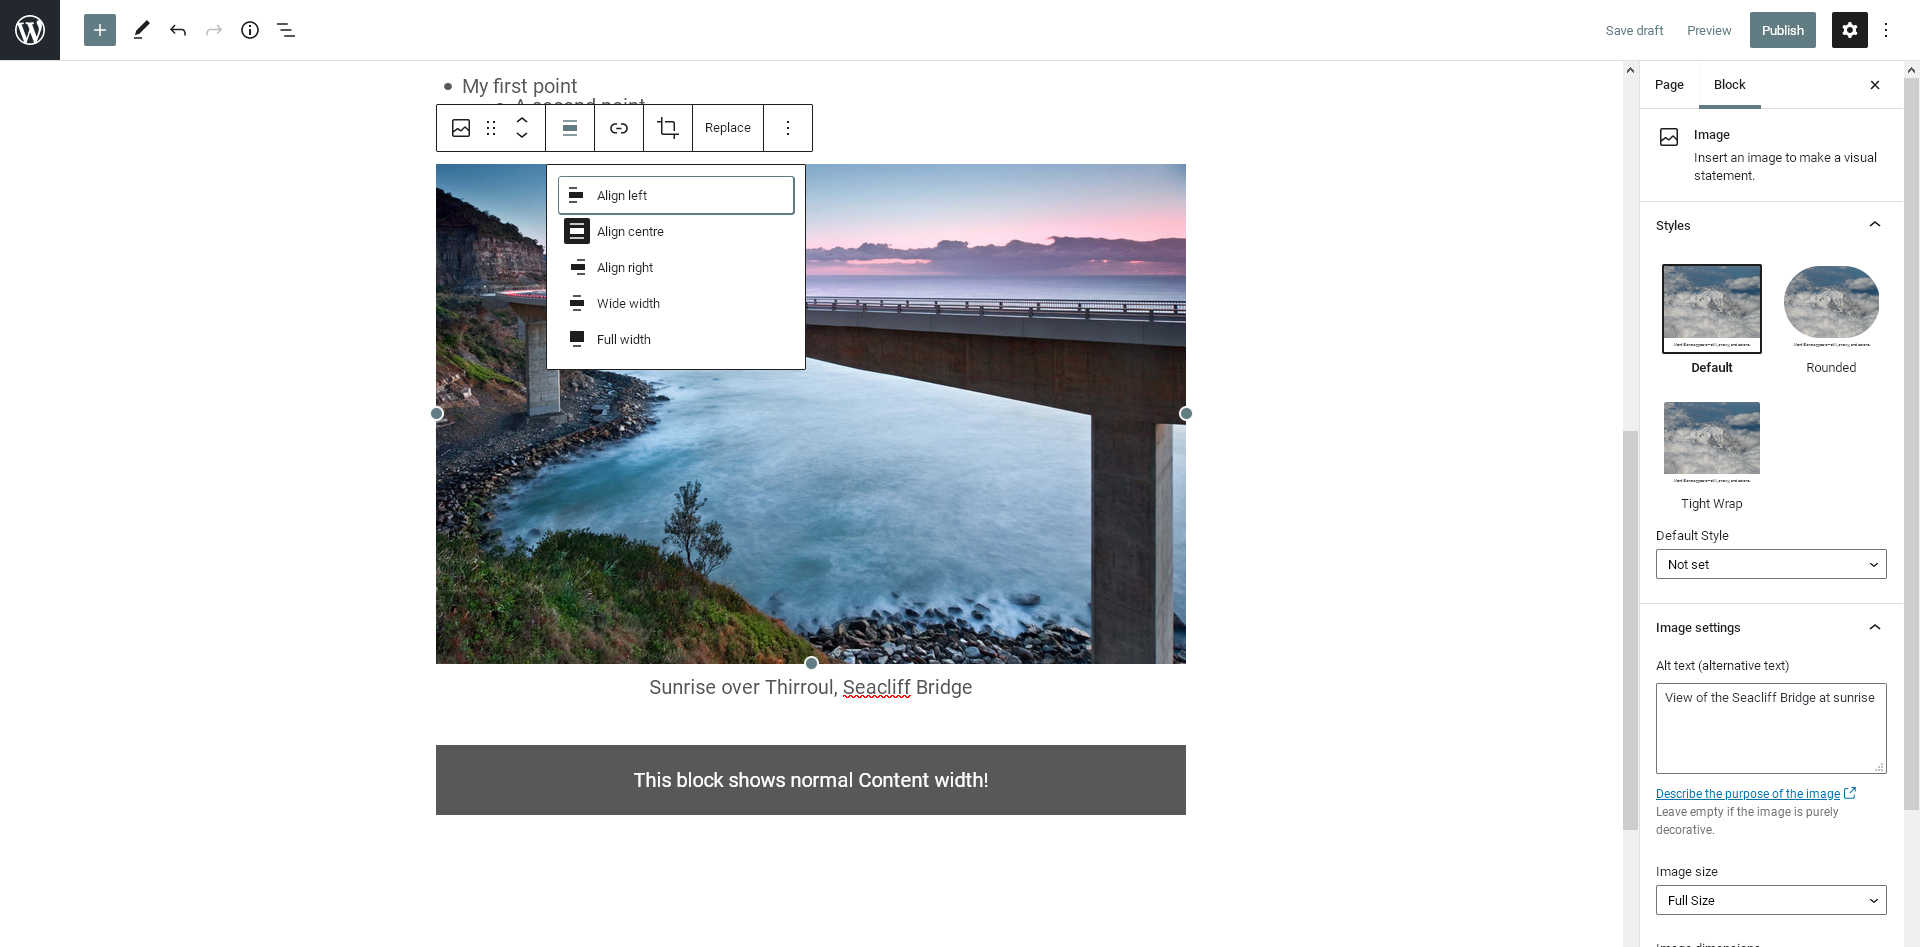
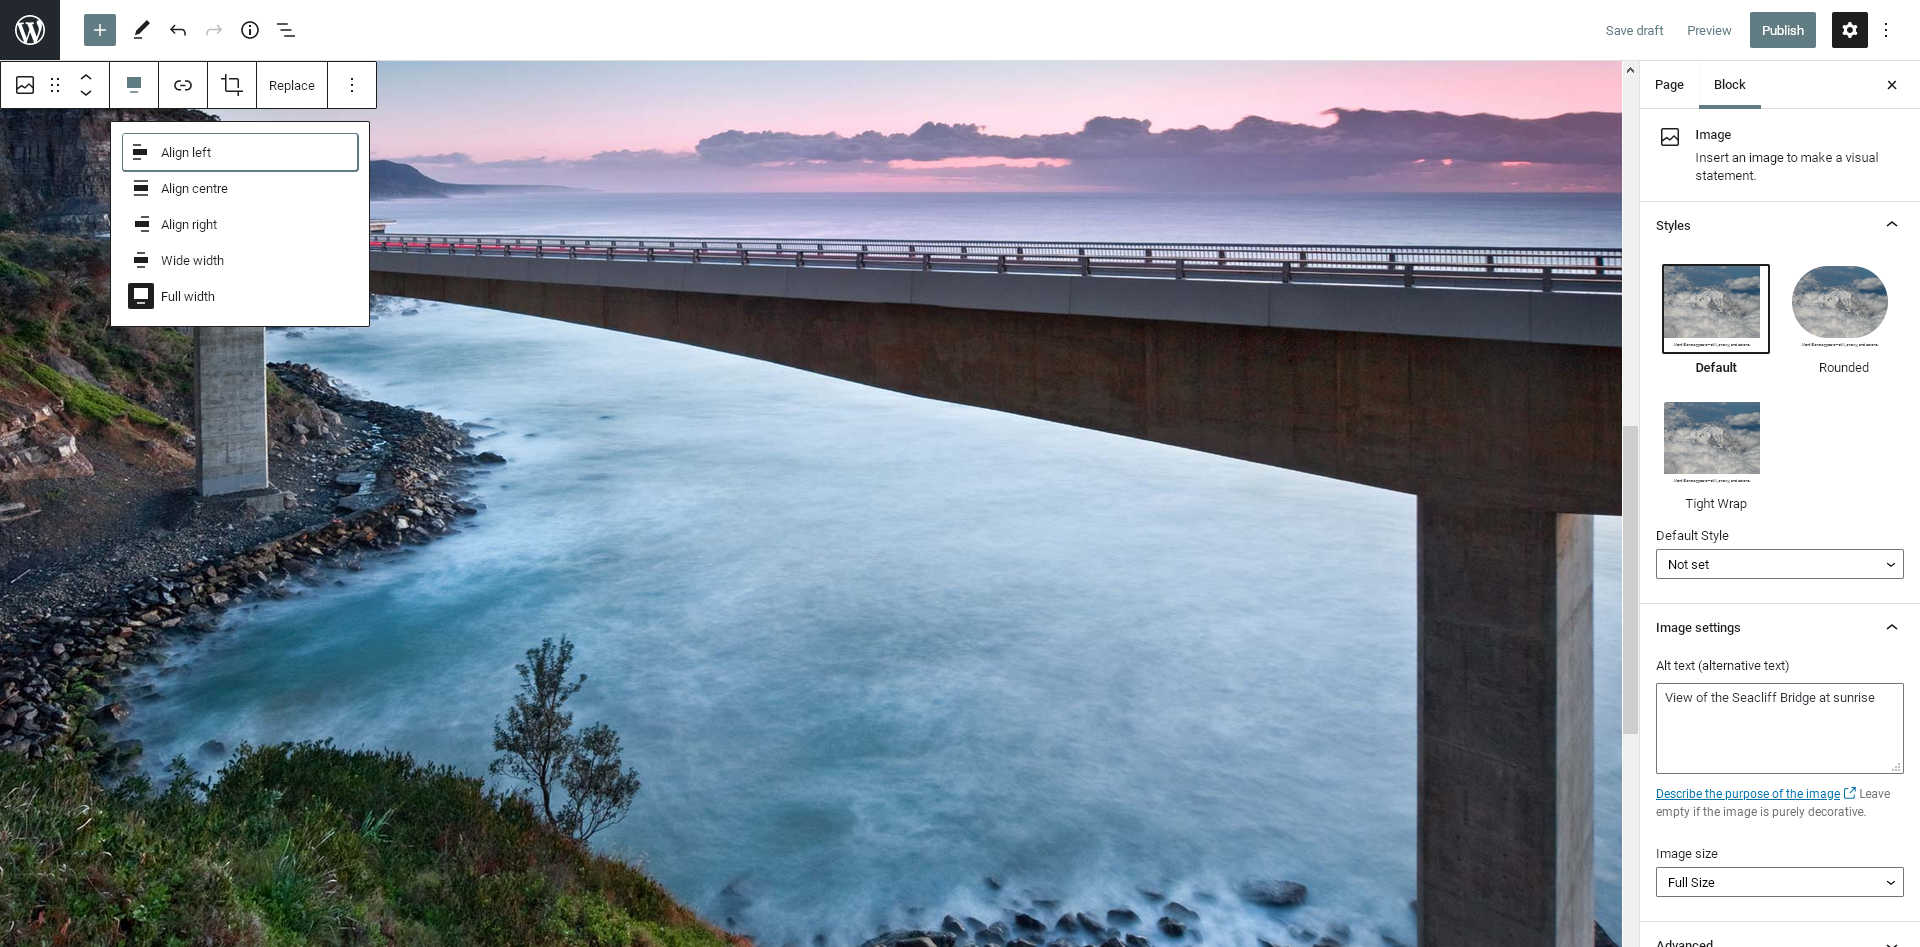
Wide Width
The image will stretch to cover an area somewhat wider than the text content, overriding any other size setting you have chosen. This is a very nice choice for important feature images, but it typically has no effect on a page with a sidebar.
Full Width
The image will stretch to 100% of the page size, overriding any other size setting you have chosen. This type of image make a huge statement, so we should use them sparingly (if at all)! Like Wide alignment, Full is usually overruled on pages where there is a sidebar.
Align Left and Align Right
Left- or right-aligned images will “float” beside other content, allowing text to wrap around them. This setting will only work if the image is smaller than the normal content width.
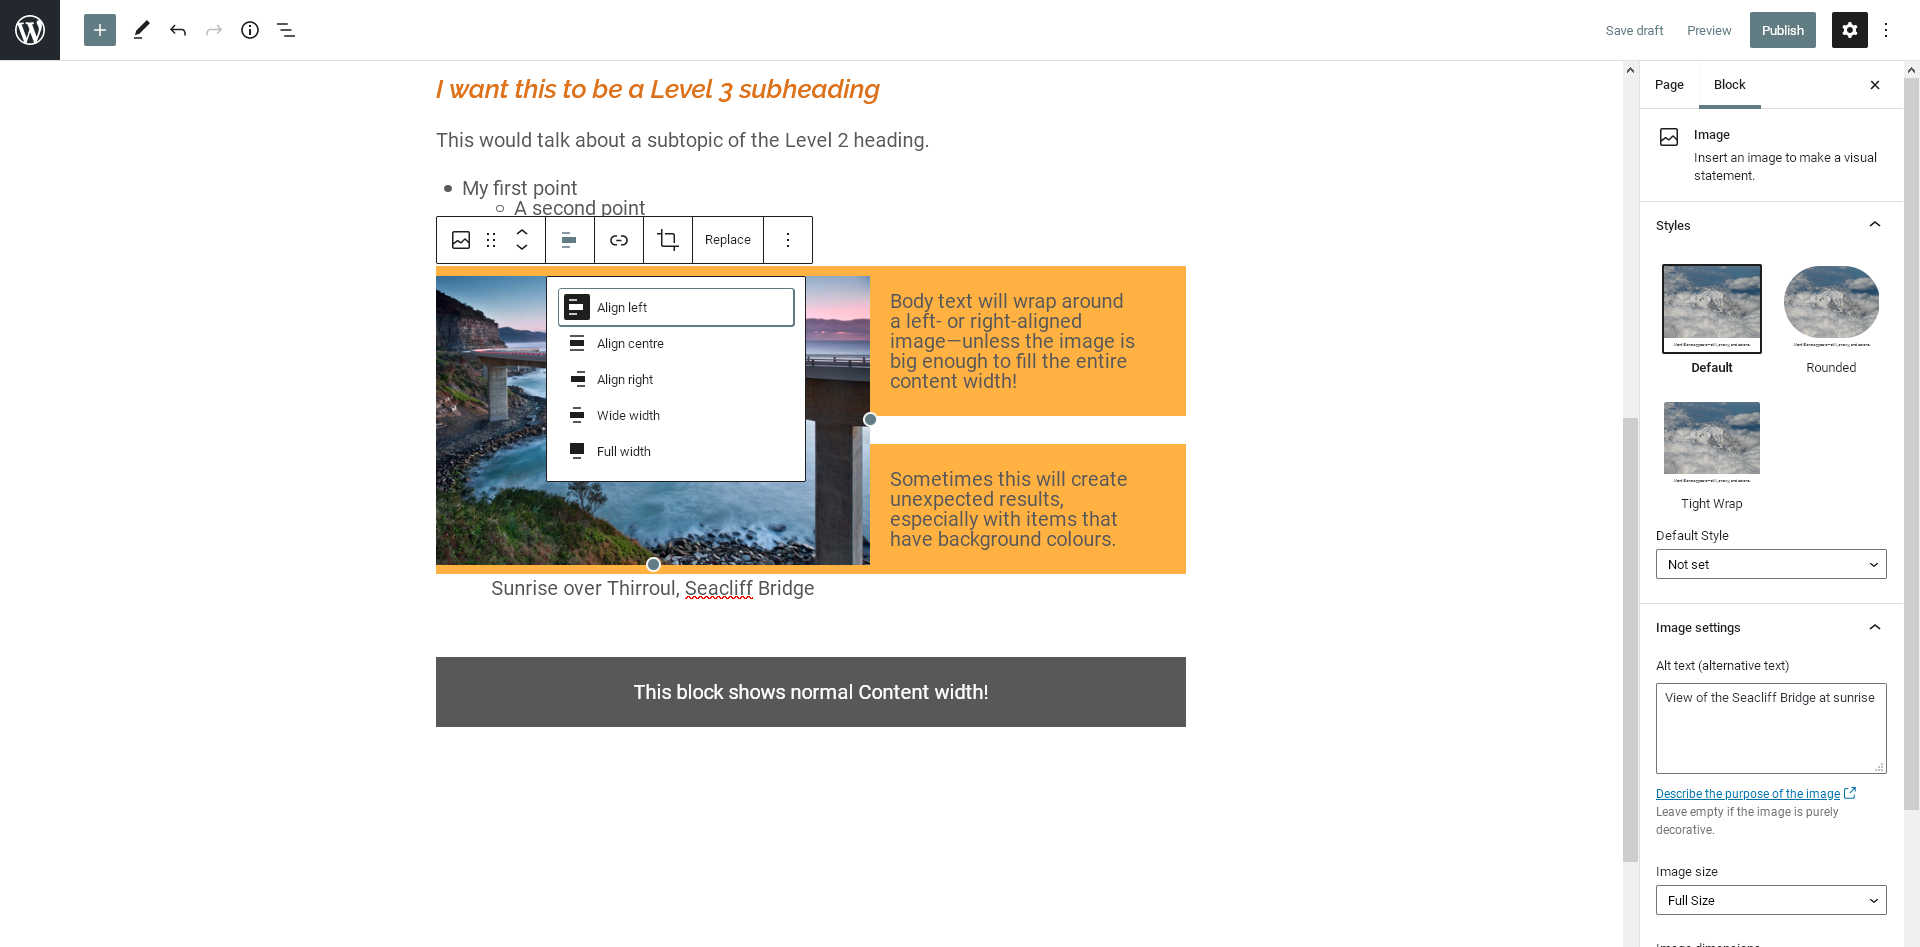
“Floating” images can that this can sometimes cause unexpected results, especially if your text has a background colour set. (As in this example.) If you need a more reliable two-column layout, you should try out the “Columns” block, which we will introduce in a later tutorial.
Adding File Blocks
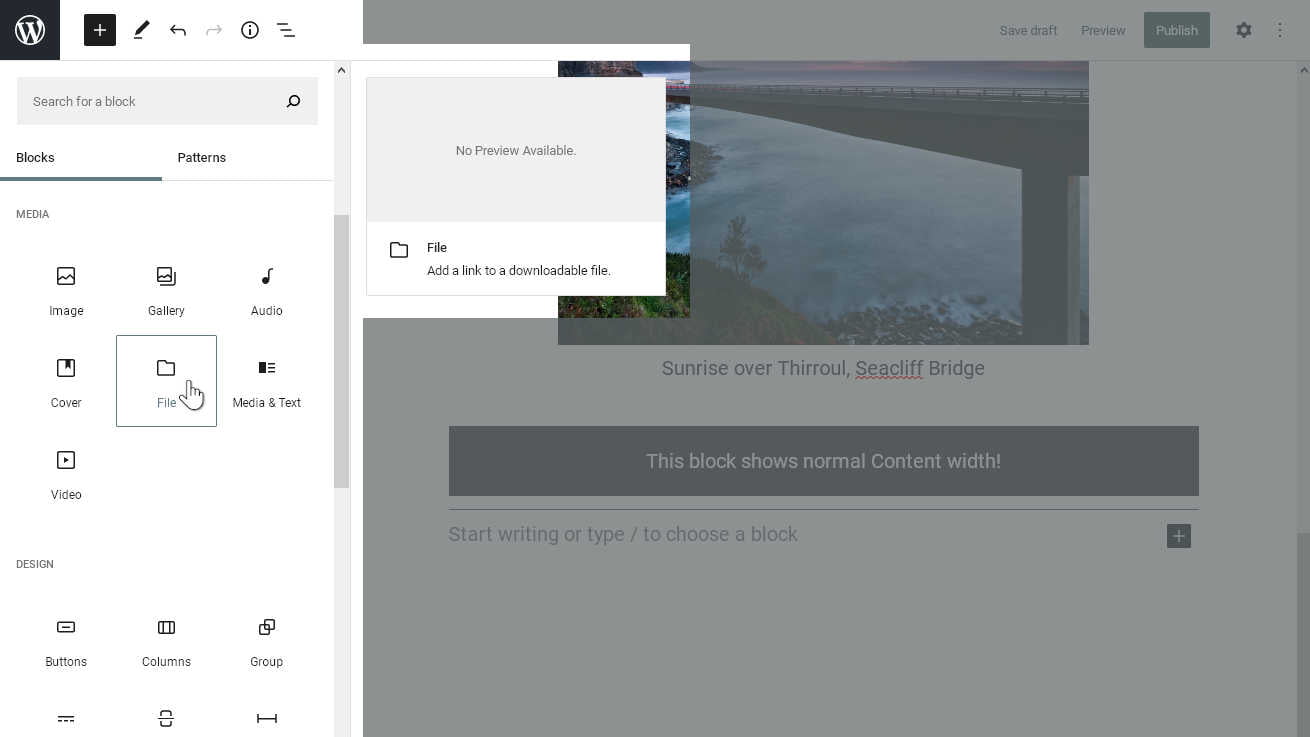
Finally, we might also want to our pages to include attachments which aren’t images. Obviously these can’t be displayed as images, so the File block instead creates a link to the selected attachment.
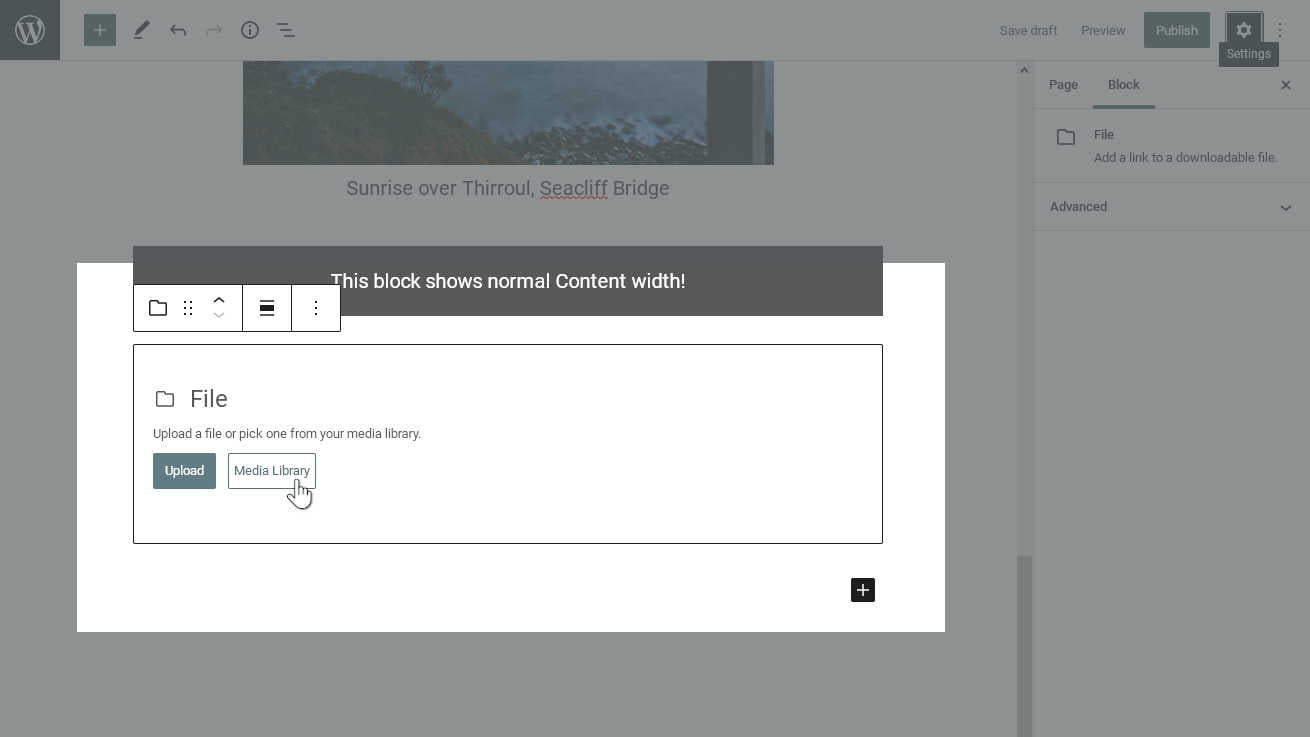
We’ll begin by choosing the File block from the “Media” section of the “Add Block” menu.
Just as we did with images, we have a couple of options for how to upload our media. Once again we will use the Media Library, following the same method detailed for uploading our image. This time, however, we’ll upload a file of another type, such as a PDF.
After uploading and selecting our attachment, we can see the final link appear with a “download” button. Visitors will be able to click the button to download our file.
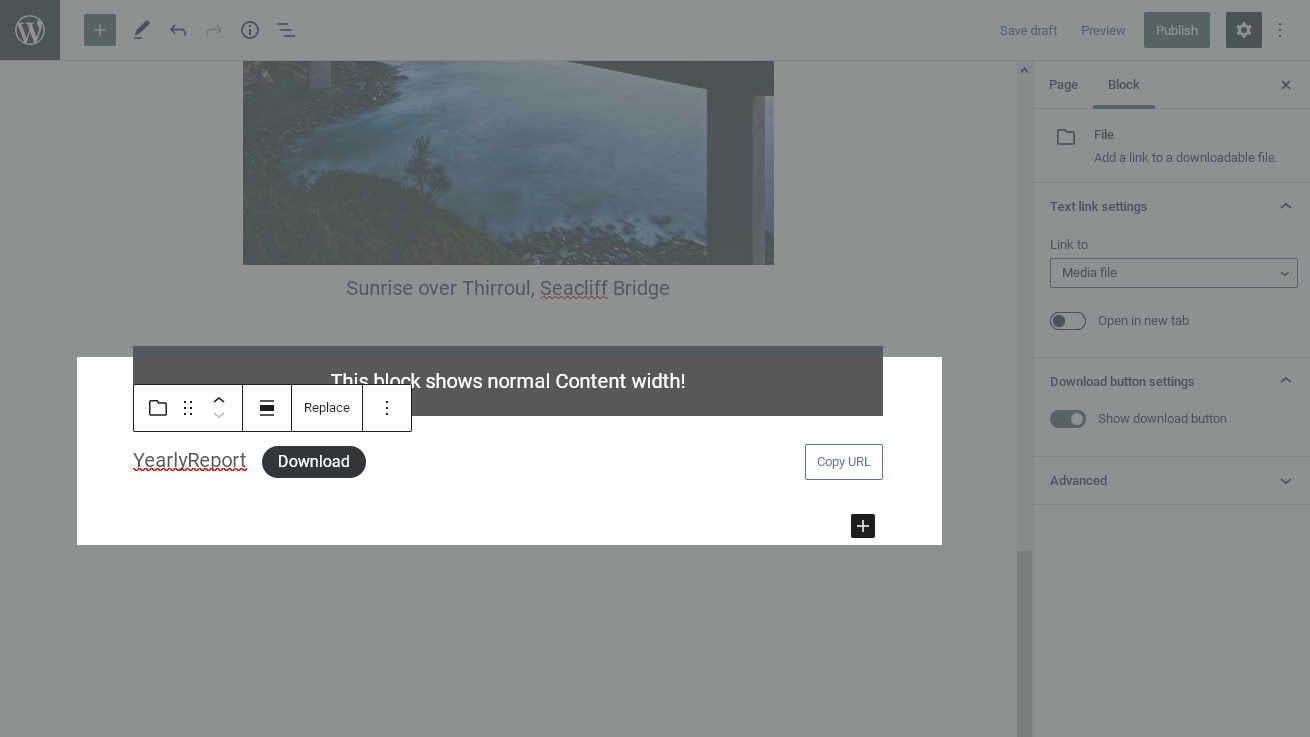
If we wanted our download link to be fancier than just a button with some text, we can always upload an image and link it to the file’s location. The file block provides a “Copy URL” button to help us with this!
What’s Next?
We have completed our content, so it’s time to publish! We will step through publishing process and set page attributes in Part 4: Page Properties and Publishing.