
Ready to add some new content to your WordPress site? This tutorial will give you a brief overview of the WordPress editing interface, with everything you need to create your first Page.
If you’re still coming to grips with the basics, you might want to start with our Welcome to WordPress tutorial instead. Otherwise, read on!
Note: This tutorial applies to the “classic” WordPress editing interface, which was replaced by the Blocks (or “Gutenberg“) editor in WordPress version 5.0. If you are working with a more recent version of WordPress, please check back soon for an updated Blocks editor tutorial!
Adding a Page
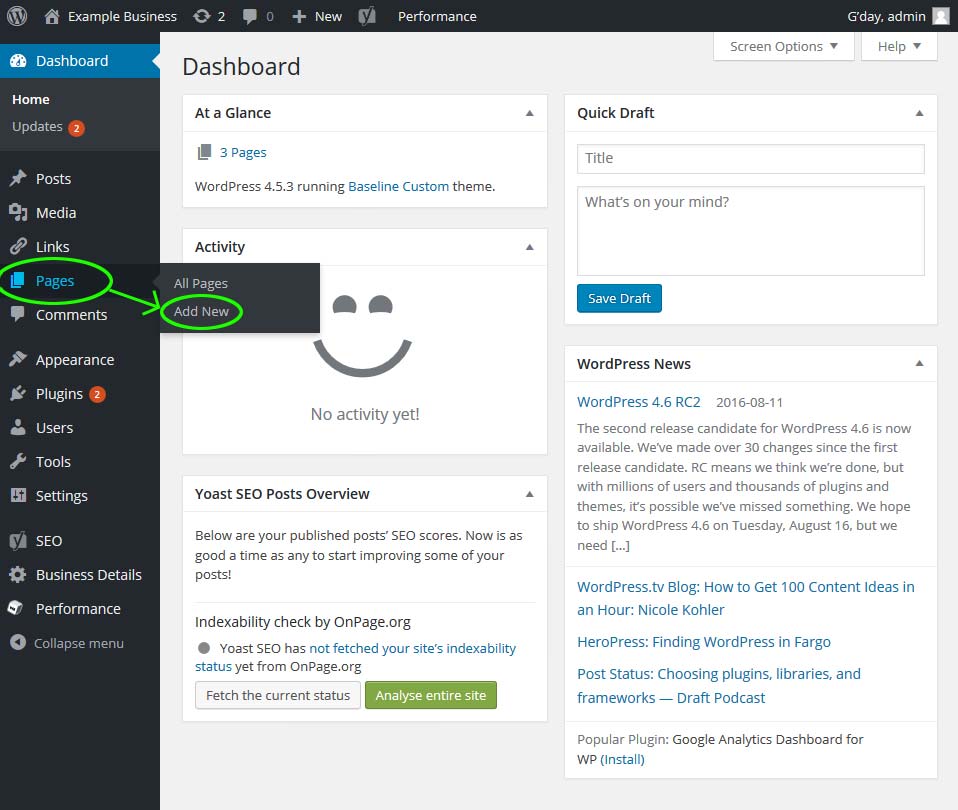
Adding a new page to your WordPress site is a relatively simple process. First you’ll need to log in, which will take you to your Dashboard. From here, hover over the “Pages” item in the left-hand sidebar, and select “Add New”.
You’ll be taken to an editing interface that’s a bit like the word processor on your computer or tablet:
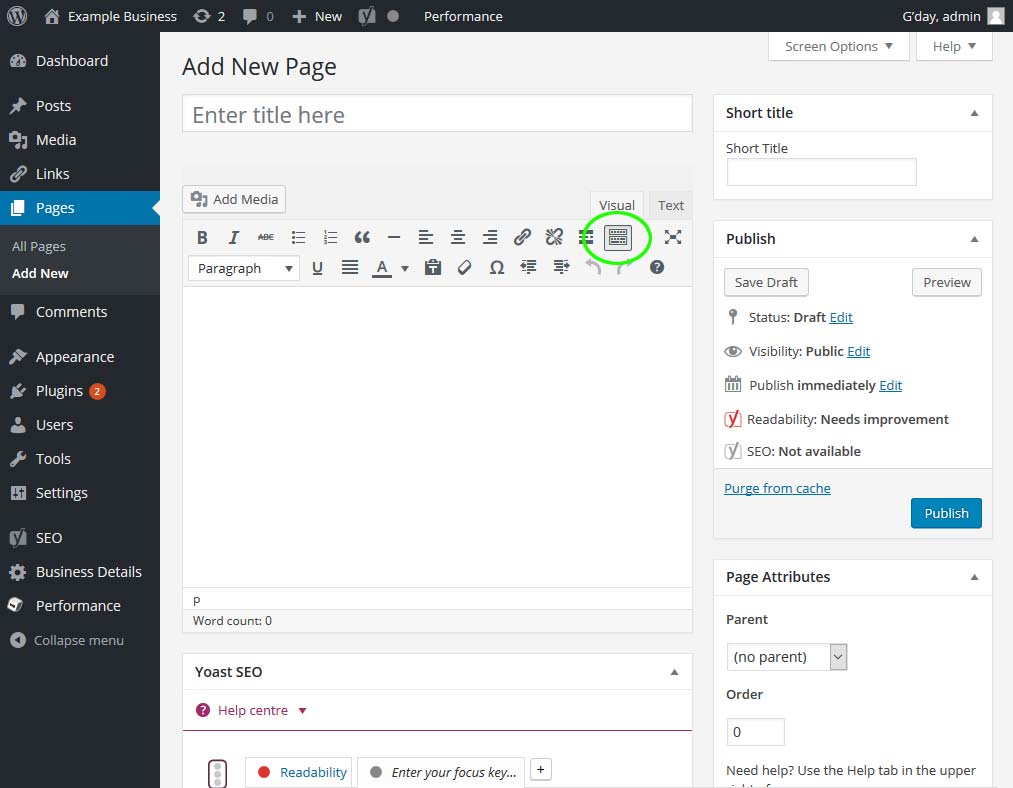
If you don’t see the entire set of tools above the main text area, look for the button that looks like a keyboard (circled above). Pressing this button will show or hide the more advanced text editing tools.
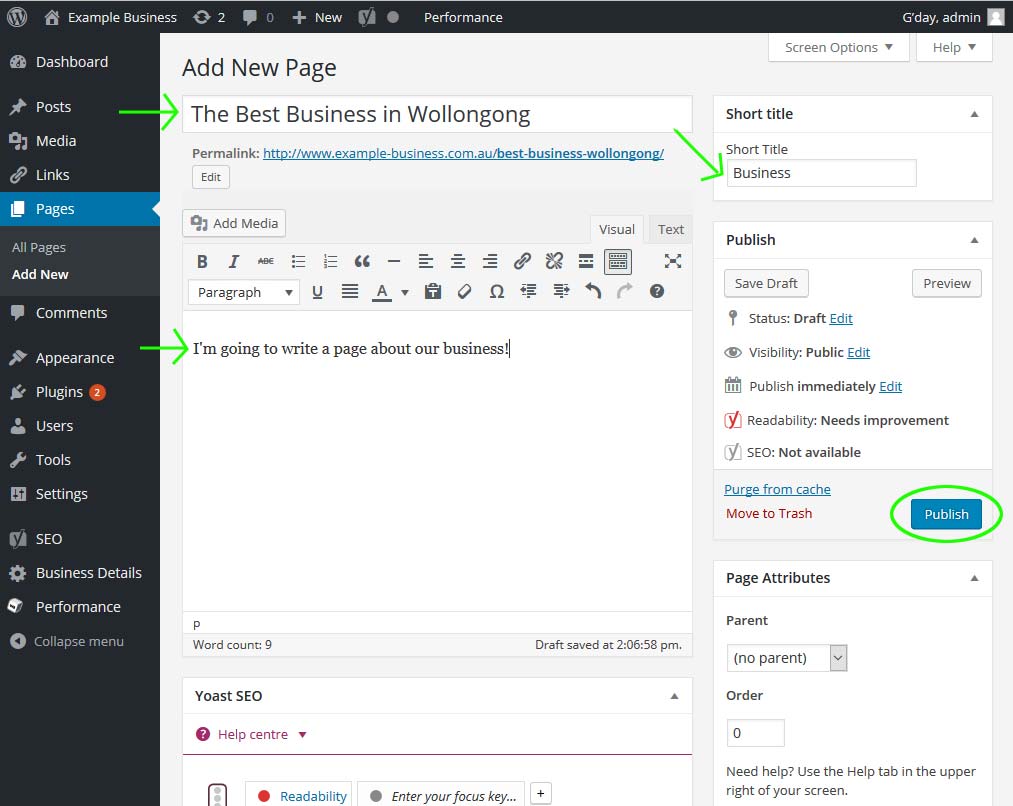
To create your page, there are three important fields to fill in: the Title, the Short Title, and the actual page content.
Title
The Title or main heading will be displayed at the top of your page (sometimes referred to as Heading 1 or H1). It is important to choose a good title that immediately tells your visitors what your page is about.
The “Permalink” field you can see above will appear automatically when you add a title. The permalink is the specific address, within your site, for this particular page. It’s based on the page title, but some characters that can’t appear in online addresses (like & and ?), and some common words (like “and” and “the”), will be removed. If you don’t like the permalink WordPress makes automatically, you can edit it yourself by clicking the “Edit” button beneath it.
Short Title
The Short Title will appear in your website’s “breadcrumbs”—the little links at the top of each page that show the user how far into the site they’ve navigated—so it should be only one or two words. Usually, you should choose the most important part of the Page title.
Note: This field is specific to IT Wollongong WordPress themes. If you’ve changed your site’s appearance, you may not see this field.
Page Content
Finally, your page content can include as much text as you like. Just as you can in Microsoft Word or Google Docs, you can use the buttons provided to create lists, bold or italic text, and links to other content.
When you’ve completed your page, click the “Publish” button (circled in our example above) to make your new page available to visitors. Try to make sure your page is error-free before publishing—if you need to come back to it later, click “Save Draft” instead, and publish later. Don’t worry too much, though! If you make a mistake, you can always come back and edit the page.
Headings
One important tip for making pages is to use Headings correctly. You can apply your own formatting to make some text look like a heading, but in order to make it display properly (in a way that matches your site’s visual theme) you should apply a style. Fortunately, this isn’t difficult!
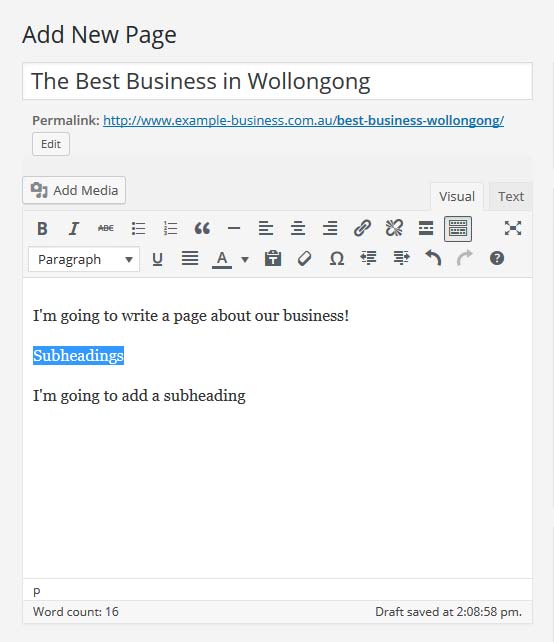
First, select the text that you want to make into a heading. Then, from the toolbar, select the dropdown menu for styles (by default, this will be set to “Paragraph”, like in our screenshots). From the list provided, click on one of the Heading styles to select.
%27%20fill-opacity%3D%27.5%27%3E%3Cpath%20fill%3D%22%23cecece%22%20fill-opacity%3D%22.5%22%20d%3D%22M-38.9%20377.4L16.3-38.9l576.8%20198.1z%22%2F%3E%3Cellipse%20fill%3D%22%23fff%22%20fill-opacity%3D%22.5%22%20rx%3D%221%22%20ry%3D%221%22%20transform%3D%22matrix(-414.3128%2094.75443%20-43.96772%20-192.24842%20358.4%20469.9)%22%2F%3E%3Cellipse%20fill%3D%22%23dadada%22%20fill-opacity%3D%22.5%22%20rx%3D%221%22%20ry%3D%221%22%20transform%3D%22matrix(-188.50189%2040.51382%20-10.73766%20-49.95996%20463.1%20203.1)%22%2F%3E%3Cpath%20fill%3D%22%23fff%22%20fill-opacity%3D%22.5%22%20d%3D%22M191.8-21.3L585.6-39l5%20198.1z%22%2F%3E%3C%2Fg%3E%3C%2Fsvg%3E)
Highlighting body text to be turned into a heading in the WordPress editor %22%20transform%3D%22translate(1.3%201.3)%20scale(2.50781)%22%20fill-opacity%3D%22.5%22%3E%3Cellipse%20fill%3D%22%2353b996%22%20cx%3D%2242%22%20cy%3D%22133%22%20rx%3D%2241%22%20ry%3D%2236%22%2F%3E%3Cellipse%20fill%3D%22%23fff%22%20rx%3D%221%22%20ry%3D%221%22%20transform%3D%22matrix(-44.0965%20-61.97966%20145.94597%20-103.8358%20137.2%20213.8)%22%2F%3E%3Cellipse%20fill%3D%22%23d6d2d4%22%20cx%3D%2276%22%20cy%3D%2262%22%20rx%3D%22111%22%20ry%3D%2250%22%2F%3E%3Cellipse%20fill%3D%22%23fff%22%20rx%3D%221%22%20ry%3D%221%22%20transform%3D%22matrix(-113.8706%20-42.39325%2012.19024%20-32.74364%20191%2010.1)%22%2F%3E%3C%2Fg%3E%3C%2Fsvg%3E)
Selecting a heading level in the WordPress editor %27%20fill-opacity%3D%27.5%27%3E%3Cpath%20fill%3D%22%23cfcfcf%22%20fill-opacity%3D%22.5%22%20d%3D%22M593.1%20161.8l-632%20235.7L16.3-39z%22%2F%3E%3Cellipse%20fill%3D%22%23fff%22%20fill-opacity%3D%22.5%22%20rx%3D%221%22%20ry%3D%221%22%20transform%3D%22matrix(-85.06144%20-205.35648%20441.88212%20-183.03357%20315.8%20521.8)%22%2F%3E%3Cellipse%20fill%3D%22%23fff%22%20fill-opacity%3D%22.5%22%20rx%3D%221%22%20ry%3D%221%22%20transform%3D%22matrix(-248.00381%20-100.20005%2025.72608%20-63.67429%20484.2%2045.1)%22%2F%3E%3Cpath%20fill%3D%22%23fff%22%20fill-opacity%3D%22.5%22%20d%3D%22M-72%20486.3l65.7-140.9L571%20614.6l-65.7%20141z%22%2F%3E%3C%2Fg%3E%3C%2Fsvg%3E)
The completed heading in the WordPress editor

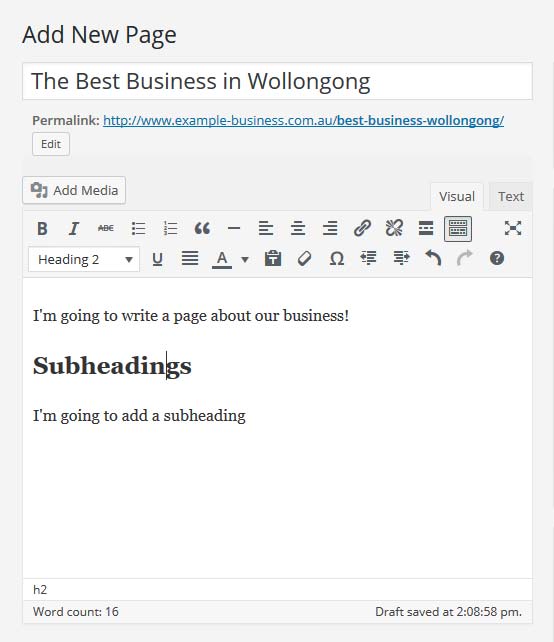
The main page heading is automatically formatted as “Heading 1”. Therefore, you shouldn’t normally use “Heading 1” in the body of your page. Instead you should start with “Heading 2”, and if there are subheadings in the same section, you can move on to Heading 3, 4, and so forth.
The different levels of heading are used hierarchically to structure the ideas you present in your article. For example, if your article had a section related to cars, you would format its heading as Heading 2. Then, if you wished to include create sub-sections for types of cars, you would use Heading 3.
Headings are especially important because you can’t set the size of your text using the editor. Applying the correct heading style will keep your website looking great and will also help the search engines understand your article!
Adding Images
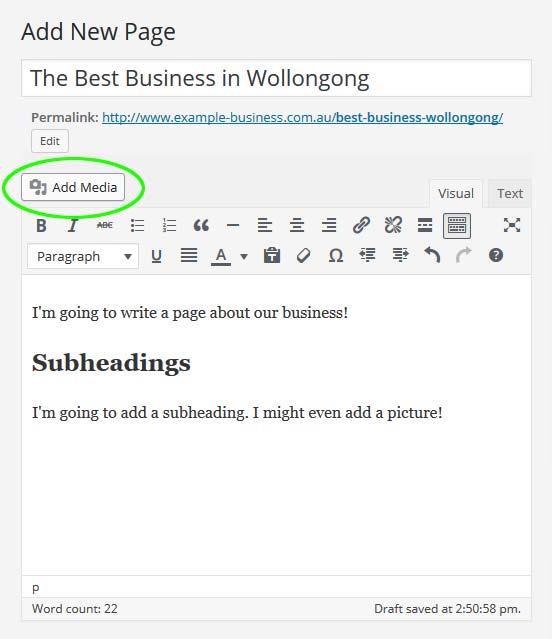
You can also add images, videos and other content to a page, by using the “Add Media” button above the toolbar.
Clicking this button will bring up the Insert Media screen. From here, you can upload new media, or insert media you have uploaded previously. You can use the “tabs” at the tops of the page (just under “Insert Media”) to swap between viewing the upload interface, or the library listing.
To upload new media, you can drag files from your computer folders into the browser window. You can also Click the “Select Files” button to locate files on your computer.
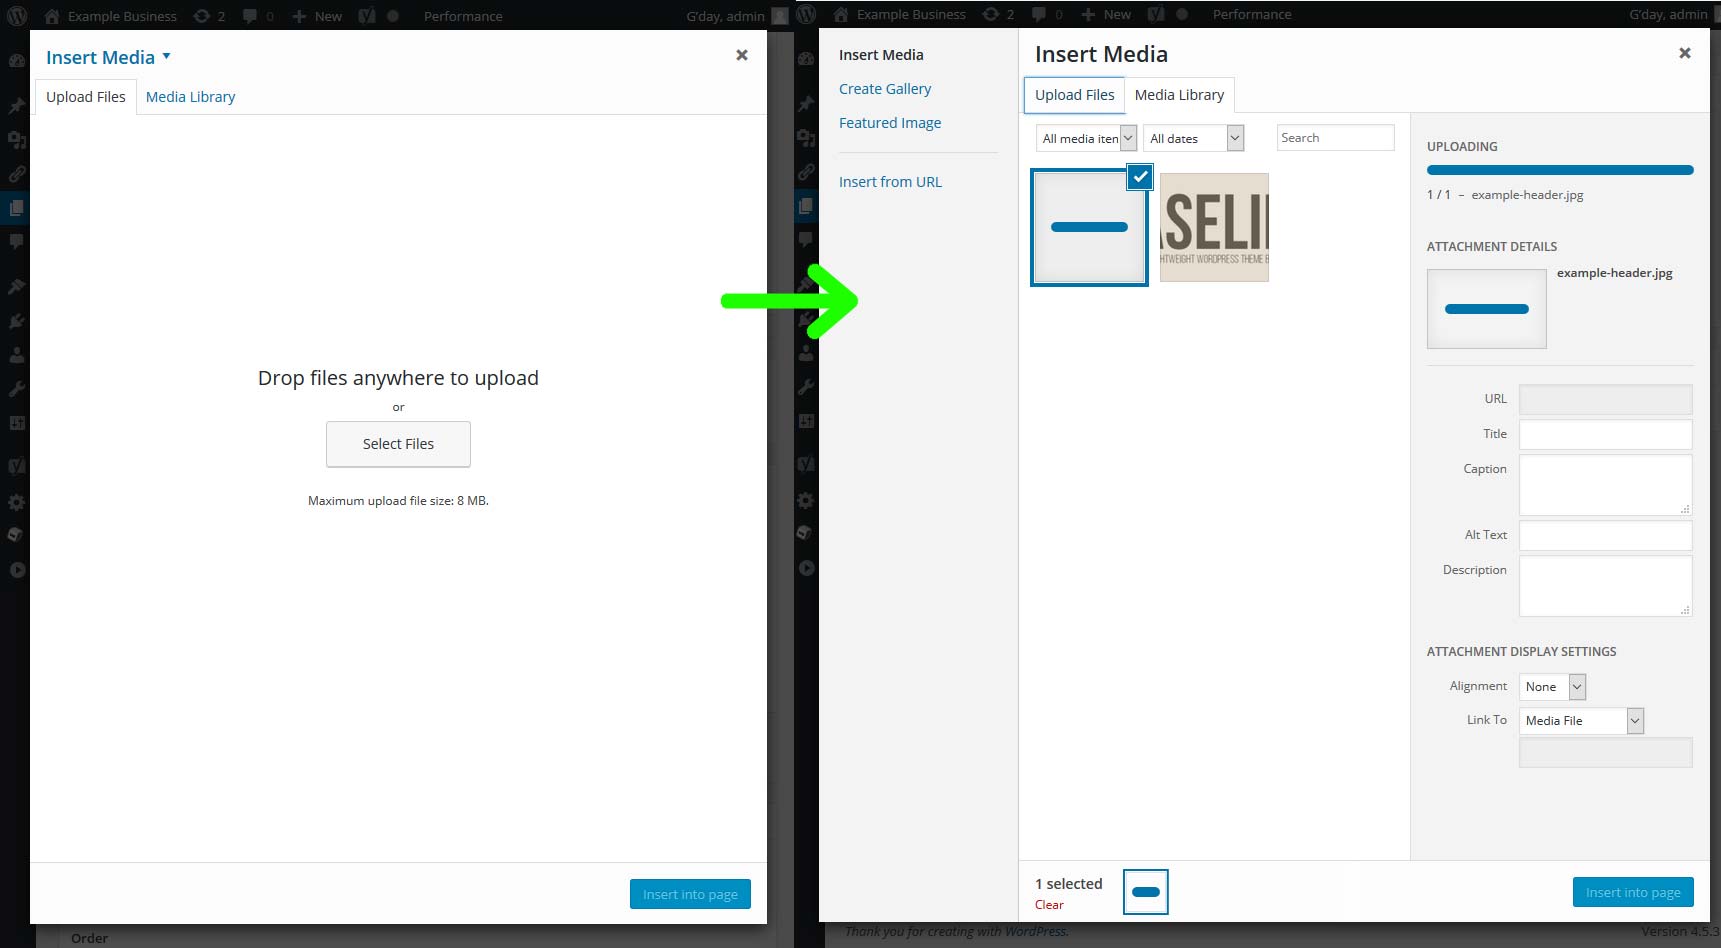
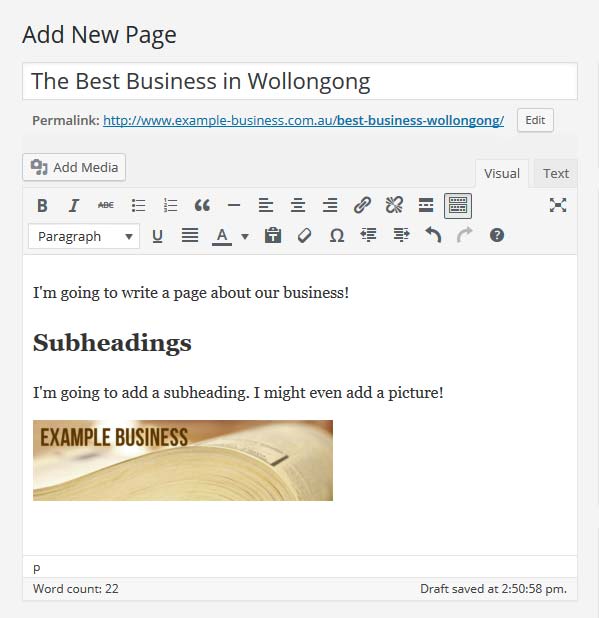
When your file starts uploading, the interface will automatically switch to the “Media Library” tab, where you can see the progress of your uploading file. Once the upload process is completed, ensure that your image is selected (surrounded by a blue border and marked with a checkbox, as in our example above). Then, press the “Insert into page” button, in the lower right corner, to add your image to the page.
You can also add groups of images as a single object, which WordPress calls “galleries”. Adding galleries are a bit more advanced than adding single images, so we’ve written a separate guide to working with WordPress galleries.
Page Parent
One final attribute that’s useful to know about is the Page’s Parent. If your website has only a few pages, you probably don’t need to worry about setting Parents. However, as your website grows, you may find it useful to organise your pages in a logical way – like having a table of contents in a book.
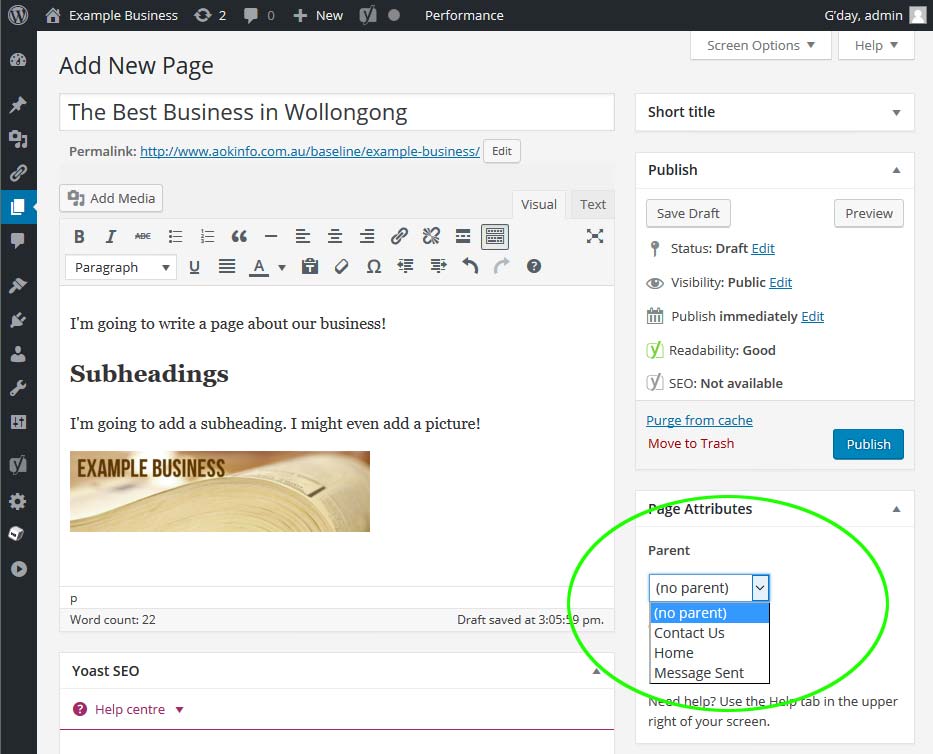
For example, imagine that you have one page about Pets, one page about Cats and one page about Dogs. Cats and dogs are both types of pets, so you would set “Pets” as the Parent page for both the Cats page, and the Dogs page. Later, you might add a page about Animals in general. You would set that as the Parent of your “Pets” page, creating another level at the top of the structure…
- Animals
- Pets
- Dogs
- Beagles
- Greyhounds
- Cats
- Burmese
- Dogs
- Wild Animals
- Pets
…And so on. Each page only needs to know what its own Parent is, so you can create as many levels as you need. This has the added benefit of allowing “Breadcrumbs” to show visitors how deep they are into the site, and which other pages relate to their current location.
Time to Write!
Now that you know the basics, it’s time to start writing your very own WordPress content. If you’re eager to make some more advanced content, you might be interested in our Working with Galleries tutorial next. And remember, if you need some professional help getting your content off the ground, we’re happy to provide!