
When you add new pages to your site, they don’t appear on the main menu by default. This is because not every page needs to appear in the main menu (there’s limited space there, after all).
If you want to add a new page to the menu, select the Appearance item from your Dashboard, then click “Menus”.
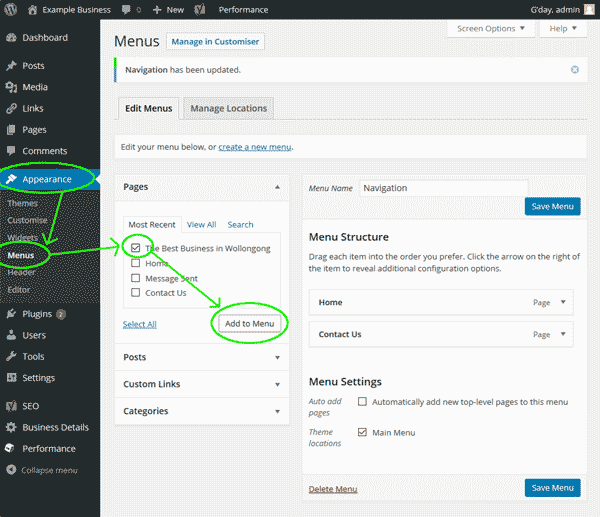
As above, your site’s main menu will be loaded by default. On the right you can see what’s currently in this menu. The left side contains a panel of items, arranged in several tabs, which you might want to add.
Any pages you’ve created should be listed under the topmost tab, “Pages”. To add one of them, just click the checkbox next to it, then press the “Add to Menu” button.
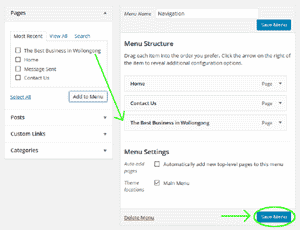
A link to your page will be added to the menu area on the right. By default, the new item will be added to the end of the menu. If you want to change the order of the menu items, you can click and drag the items to rearrange them as you like. Then, press the “Save Menu” button to confirm your changes.
By default, the text for the item (which will appear on the menu) is the same as the Title you set for the page. If your page has a nice long title, you may want to change the menu item to something shorter. You can do this by clicking the drop-down arrow next to your menu item on the right.
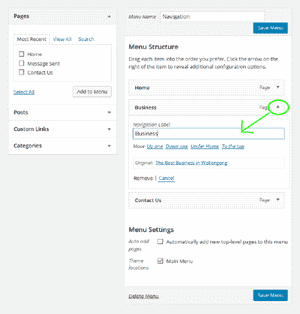
Clicking the arrow reveals a “Navigation Label” field where you can enter a new label for the item (you can see the original label just below). You can also use the links here to move the item up or down in the menu order, if it’s difficult for you to use drag-and-drop on your device. Once again, you’ll need to press “Save Menu” when you finish editing.
Finally, if your site has more than a few pages, you’ll probably want to create a multi-level menu. (We might have already made one for you, if you started with several pages.) Just like parent pages, a multi-level menu helps your visitors by organising your pages in a way that’s logical and easy to understand. In fact, the levels of your menu should match up with how you’ve set your parent pages.
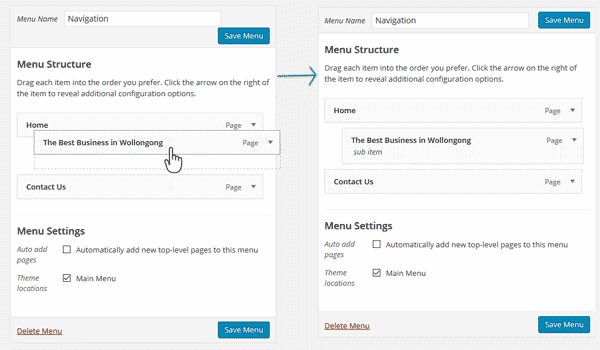
To create a second menu level, just click and drag the item beneath its parent, then drag it a little further to the right. The item will “snap” into place beneath its parent, as in our example above. Don’t forget to save your changes!
You can add a third level to your menu, but our themes normally only display the first two levels. Users can still find lower-level pages—either by links or via a search engine—but they won’t see them on the menu. Most often, they’ll find these pages when you provide a link from a higher level page.